How to Fix a Blender That Won’t Spin
Introduction
There is nothing more frustrating than turning on your blender and hearing the motor run while the blades stay completely still. Most people assume the blender is dead and immediately start looking for a replacement, but that is usually not the case. In many situations, the problem comes from a small worn-out part that can be replaced in just a few minutes.
A blender that will not spin is often caused by a damaged drive coupling, loose blades, or a motor issue. The good news is that these problems are usually simple to diagnose at home without needing professional repair services. Spending a few euros on replacement parts can save you from buying an entirely new appliance.
In this guide, we will go through the most common reasons a blender stops spinning and explain how you can fix it yourself.
Check the Blender Coupling First
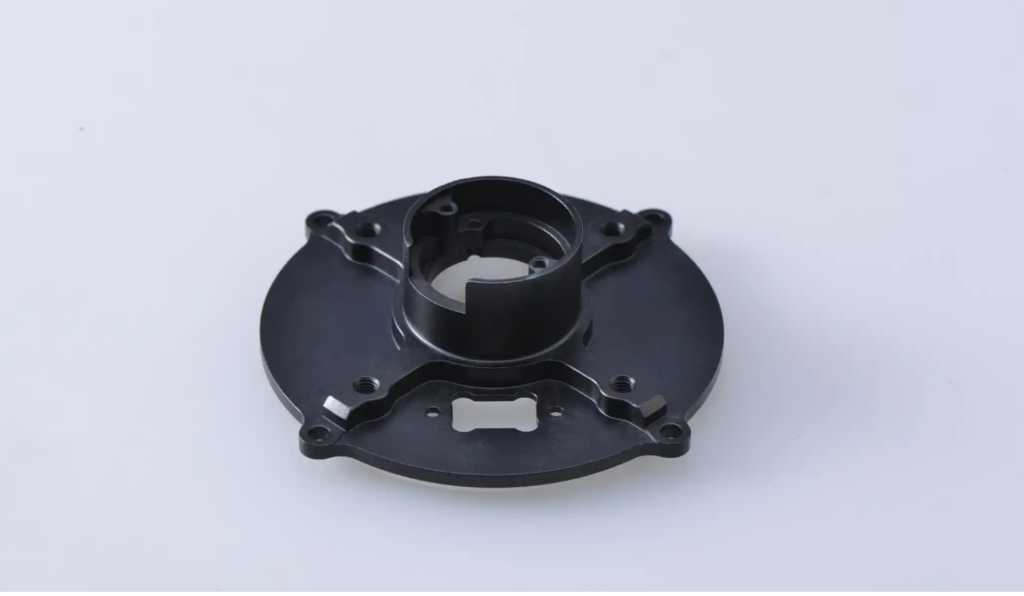
One of the most common causes of a blender not spinning is a worn or broken coupling. The coupling is the small rubber or plastic piece that connects the blender motor to the blade assembly. Over time, this part wears down from constant use.
A damaged coupling usually shows visible signs of wear. You might notice cracks, smooth edges, or missing grooves. Sometimes the motor spins underneath, but the blades do not move because the coupling can no longer grip properly.
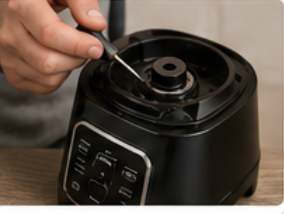
To inspect it, unplug the blender and remove the jar from the base. Look directly at the center piece on the motor base. If it appears damaged or loose, replacing it is often the easiest solution.
Many blender owners are surprised by how inexpensive this repair can be. A replacement blender clutch or coupling normally costs far less than replacing the whole appliance.
Inspect the Blade Assembly
If the coupling looks fine, the next thing to inspect is the blade assembly. Food buildup, rust, or damaged bearings can stop the blades from turning correctly.
Remove the blender jar and carefully try spinning the blades by hand. If the blades feel stuck or difficult to move, there is likely a problem inside the assembly.
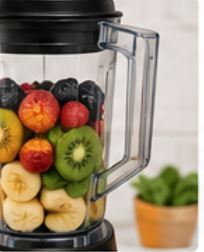
Sometimes thick smoothie ingredients, frozen fruit, or seeds can get trapped around the blades and prevent movement. Cleaning the assembly thoroughly with warm water may solve the issue immediately.
If the blades still do not spin smoothly after cleaning, you may need a replacement blade assembly. Continuing to force the blender to run can damage the motor over time.
Listen to the Blender Motor
The sound your blender makes can tell you a lot about the problem.
If the motor makes a humming sound but the blades do not spin, the issue is usually related to the coupling or blade assembly. In this case, the motor is still functioning normally.
If the blender makes no sound at all, the problem could be electrical. Check the power cable, outlet, and safety switches before assuming the motor is broken.
Some blenders also have thermal protection systems. If the appliance overheats, it may temporarily stop working until it cools down. Letting the blender rest for 20 to 30 minutes can sometimes solve the problem.
How to Replace a Blender Coupling
Replacing a blender coupling is much easier than most people expect. In many cases, the process takes less than ten minutes.
First, unplug the blender completely. Remove the old coupling carefully using pliers or by unscrewing it, depending on the blender model. Some couplings are reverse-threaded, so turning clockwise may loosen them.
Once removed, clean the surrounding area before installing the new part. Make sure the replacement coupling matches your blender model exactly.
After installing the new coupling, test the blender with water before blending food. This helps confirm that the blades are spinning correctly and everything is secure.
A simple repair like this can extend the life of your blender for years.
When It Makes More Sense to Repair Instead of Replace
A lot of people replace appliances too quickly when the issue is actually minor. Blenders are a good example of this. Small replacement parts are affordable, easy to install, and widely available online.
Repairing instead of replacing also reduces unnecessary waste. If the motor still works properly, replacing one worn-out part is usually the smarter option financially.
For many blender owners, repairing the appliance becomes the better choice once they realize how simple the process actually is.
Final Thoughts
A blender that will not spin does not always mean the appliance is ruined. In many situations, the issue comes from a worn coupling, stuck blade assembly, or minor motor protection problem. Taking a few minutes to inspect these parts can save money and prevent unnecessary replacements.
Simple DIY repairs are becoming more popular because they are affordable and practical. With the right replacement parts and a little patience, most blender problems can be fixed at home without much difficulty.
If your blender blades have stopped spinning, checking the coupling and blade assembly should always be the first step before buying a new machine.
FAQ
Why does my blender make noise but not spin?
This usually happens when the blender coupling is worn out or the blade assembly is stuck.
Can I replace a blender coupling myself?
Yes. Most blender couplings are simple to replace with basic tools.
How long does a blender coupling last?
It depends on usage, but heavy daily blending can wear the coupling down over time.
Is it cheaper to repair a blender?
In most cases, yes. Replacement parts are usually much cheaper than buying a new blender.
What replacement part fails most often in blenders?
The drive coupling is one of the most commonly replaced blender parts.

Extra Tips to Keep Your Blender Working Longer
Once you fix your blender, it is a good idea to take a few simple steps to prevent the same problem from happening again. Many blender issues happen because the appliance is overloaded or used too aggressively over long periods of time.
Try not to overfill the jar with hard ingredients like ice, frozen fruit, or nuts without enough liquid. This puts extra stress on both the motor and the coupling underneath the jar. If the blender struggles to spin, stopping and adding more liquid can help reduce pressure on the internal parts.
Cleaning the blender regularly is also important. Food residue can build up around the blade assembly and slowly affect performance. After each use, rinse the blender thoroughly and make sure no ingredients are trapped underneath the blades.
Another useful habit is checking the blender base occasionally for signs of wear. Small cracks, unusual smells, or loose parts can often be noticed early before they become bigger problems. Replacing a small part early is usually much cheaper than waiting until the appliance completely fails.
Many people are surprised by how long a blender can last when basic maintenance is done consistently. Even older blender models can continue working well for years if damaged parts are replaced when needed. This is one reason why replacement blender parts have become more popular online, especially among customers looking to save money and reduce waste.
DIY blender repair may seem intimidating at first, but most fixes are actually very manageable for beginners. With a little patience and the right replacement part, you can often restore your blender in less than an hour without needing special tools or repair experience.
Common Mistakes That Can Damage a Blender
A lot of blender problems are caused by simple mistakes people do not even realize they are making. One of the biggest mistakes is running the blender for too long without giving the motor a break. Blenders are designed for short blending cycles, especially home kitchen models. Running the appliance continuously for several minutes can overheat the motor and wear down internal components much faster.
Another common issue is blending ingredients that are too hard for the appliance. Some people try crushing large ice cubes, frozen fruit blocks, or thick mixtures in lower-powered blenders. This places extra pressure on the coupling and blade assembly. Over time, the stress can cause slipping, cracking, or complete failure of the spinning mechanism.
Using the wrong jar attachment can also create problems. If the blender jar is not locked into the base correctly, the motor may spin underneath while the blades fail to engage properly. Before assuming there is serious damage, it is always worth checking that every component is aligned correctly.
People also forget that blender parts naturally wear out with time. Rubber couplings, seals, and blade assemblies are not designed to last forever. Just like car tires or phone chargers, these parts eventually need replacement after repeated use. Replacing them early can help prevent larger and more expensive repairs later on.
Signs That Your Blender Needs Replacement Parts
Blenders usually give warning signs before completely failing. Paying attention to these small changes can help you fix the appliance before the damage becomes worse.
One common warning sign is a burning smell while blending. This can happen when the motor is struggling because the blades are jammed or the coupling is slipping. If you notice this smell regularly, it is best to stop using the blender and inspect the parts carefully.
Another sign is leaking liquid underneath the blender jar. Worn seals or damaged blade assemblies often cause this problem. Small leaks may seem harmless at first, but moisture can eventually reach the motor area and create bigger issues.
Unusual noises are also important to pay attention to. Grinding sounds, rattling, or clicking noises usually mean that something inside the blender is loose or worn out. Ignoring these sounds can eventually damage the motor permanently.
Some people also notice that their blender suddenly struggles with ingredients it previously handled easily. Smoothies may become chunkier, blending takes longer, or the blades stop moving consistently. These are often signs that the blade assembly or motor connection is wearing down.
Replacing damaged parts early can restore performance and extend the life of the appliance significantly.
Why More People Are Choosing DIY Blender Repairs
In recent years, more people have started repairing appliances themselves instead of replacing them immediately. Rising appliance prices and increased awareness about waste have encouraged customers to look for affordable repair solutions online.
DIY blender repair has become especially popular because most repairs are relatively simple compared to other kitchen appliances. Replacing a blender clutch, coupling, or blade assembly usually requires only basic tools and very little technical knowledge.
Video tutorials have also made repairs much easier for beginners. Many people watch quick repair videos on YouTube before ordering replacement parts online. Seeing someone complete the repair step by step gives customers more confidence to try it themselves.
There is also a financial advantage. A high-quality blender can cost a significant amount of money to replace, while replacement parts are often inexpensive. Spending a small amount to repair a working appliance simply makes more sense for many households.
For environmentally conscious consumers, repairs also reduce electronic waste. Throwing away a blender because of one worn-out component creates unnecessary waste when the appliance could still function perfectly with a simple replacement part.
Final Advice Before Buying a New Blender
Before deciding to replace your blender completely, it is always worth checking whether the problem can be repaired first. Many blender issues look serious at first but are actually caused by one small damaged component.
Start by inspecting the coupling, blade assembly, seals, and jar connection carefully. These are some of the most commonly replaced blender parts and are often inexpensive to fix. Taking a few minutes to troubleshoot the appliance can potentially save a lot of money.
If the motor itself is completely burned out, replacing the blender may be the better option. However, when the issue is mechanical rather than electrical, repairs are usually worth trying first.
A blender that stops spinning does not automatically mean the appliance has reached the end of its life. In many cases, replacing one affordable part is enough to get it working smoothly again.