How to Replace a Blender Clutch in Under 10 Minutes
Introduction
A blender clutch is one of those small parts most people never think about until the blender suddenly stops working properly. You press the power button, the motor runs, but the blades barely move or do not spin at all. In many cases, the issue is not the motor. It is the clutch underneath the blender jar.
The good news is that replacing a blender clutch is usually simple, inexpensive, and much faster than most people expect. You do not need advanced repair skills or expensive tools to complete the job. For many blender models, the entire process can take less than ten minutes from start to finish.
This guide will walk through how to identify a damaged blender clutch, what tools you need, and how to safely install a replacement part at home without damaging your appliance.
What Is a Blender Clutch and Why Does It Fail?
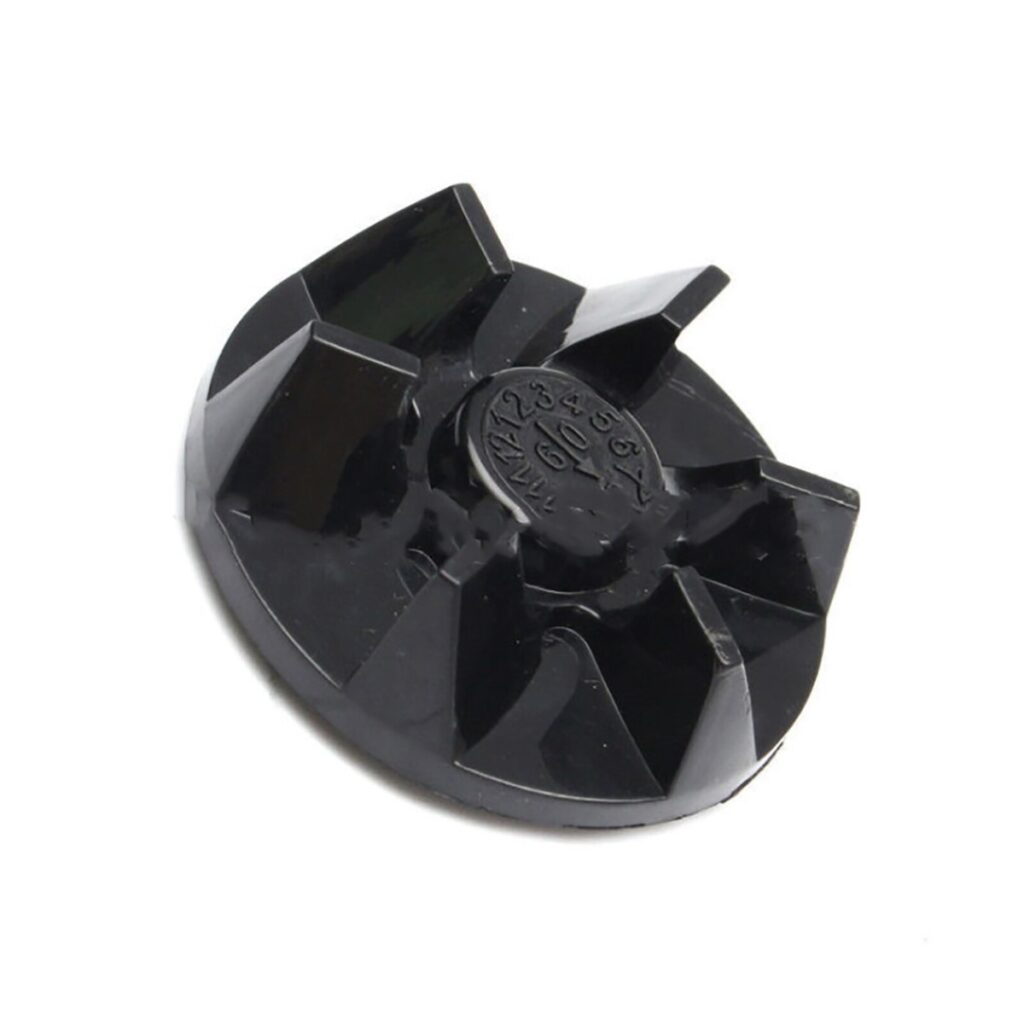
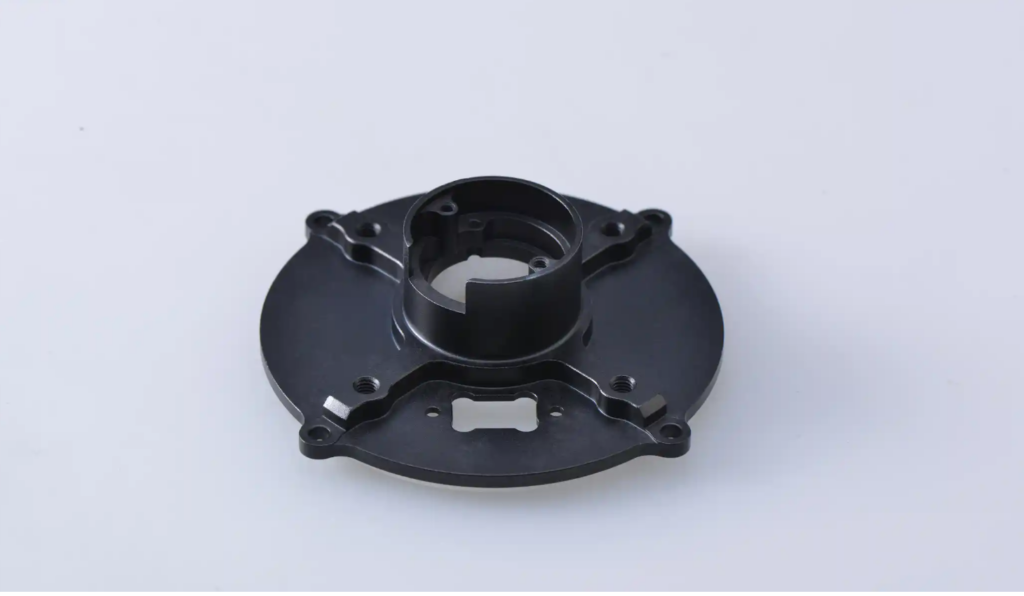
The blender clutch is the small component located on the top of the motor base. Its job is to connect the motor to the blade assembly inside the blender jar. When the motor spins, the clutch transfers that movement to the blades.
Most blender clutches are made from hard rubber, plastic, or a combination of materials designed to wear down gradually over time. This is actually intentional. The clutch is often designed to fail before the motor does because replacing a small part is much cheaper than replacing the entire appliance.
Over time, repeated blending causes the clutch to wear down. Crushing ice, blending thick mixtures, or overloading the jar can accelerate the damage. Eventually the grooves on the clutch become smooth or cracked, which prevents the blades from spinning correctly.
A damaged blender clutch usually causes very noticeable symptoms. The motor may sound normal while the blades stay still. Sometimes there is a burning smell caused by slipping friction. Other times, the blender may make unusual grinding noises during operation.
Ignoring the problem can place additional stress on the motor and other internal parts. Replacing the clutch early is usually the smartest and cheapest solution.
Signs You Need a Replacement Blender Clutch
Before ordering a replacement part, it is important to confirm that the clutch is actually the problem. Fortunately, there are several easy signs to look for.
One of the most common signs is when the blender motor runs but the blades do not move. This usually happens because the worn clutch can no longer grip the blade assembly properly.
Another sign is visible wear on the clutch itself. Unplug the blender and remove the jar. Inspect the coupling on the motor base closely. Cracks, rounded edges, or flattened grooves usually indicate the clutch needs replacement.
Some people also notice a rubber burning smell while blending. This happens because the damaged clutch slips instead of rotating smoothly. The extra friction creates heat and eventually worsens the damage.
Grinding noises are another warning sign. If the blender sounds rough or inconsistent during operation, the clutch may already be partially damaged.
Leaking liquid can also contribute to clutch problems. When liquid leaks underneath the jar, moisture may weaken surrounding components and affect performance over time.
It is important to replace the clutch as soon as these signs appear. Continuing to use the blender with a worn clutch may eventually damage the motor, which is far more expensive to repair.
Tools You Need Before Starting
One reason blender clutch replacement is so popular as a DIY repair is because it requires very few tools. Most people already have everything they need at home.
For most blender models, you will need:
- A replacement blender clutch compatible with your model
- A towel or rubber glove for grip
- Pliers or a wrench
- A screwdriver for certain blender designs
- Warm water and a cloth for cleaning
Before starting, make sure the blender is completely unplugged. Never attempt repairs while the appliance is connected to power.
It is also helpful to place the blender on a stable surface with good lighting. Small parts can be difficult to see clearly if the area is cluttered or dark.
Some blender models have reverse-threaded clutches, which means they loosen in the opposite direction from normal screws. Checking your blender model beforehand can save time and prevent accidental damage.
Step-by-Step Guide to Replacing a Blender Clutch
Replacing a blender clutch is usually much easier than people expect. Taking your time and following the correct steps can help avoid damaging the new part during installation.
Step 1: Unplug the Blender
Safety always comes first. Make sure the blender is disconnected from the power outlet before touching any components.
Even though the repair is simple, working on plugged-in appliances is never recommended.
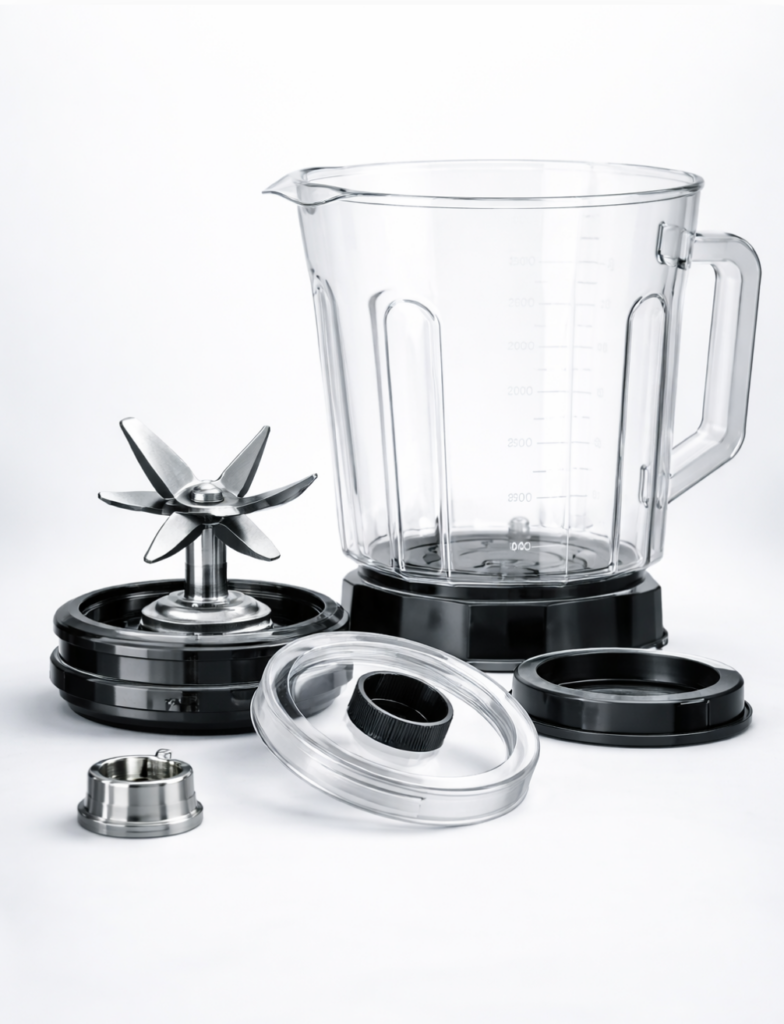
Step 2: Remove the Blender Jar
Lift the jar off the base and set it aside. This gives you clear access to the clutch located on top of the motor housing.
Take a moment to inspect the surrounding area for dust, food residue, or signs of liquid leakage.
Step 3: Secure the Motor Shaft
Some blender models require holding the motor shaft in place while removing the old clutch. This may involve accessing the bottom of the blender base.
Use a towel or glove to improve grip and prevent slipping during removal.
Step 4: Remove the Old Clutch
Depending on the model, the clutch may twist off by hand or require pliers. Many blender clutches are reverse-threaded, so turning clockwise loosens them instead of counterclockwise.
Work slowly and avoid using excessive force. If the clutch is stuck, applying gentle pressure is usually enough.
Once removed, inspect the old part closely. Most damaged clutches show clear signs of wear, including cracks or smooth edges where the grooves have worn down completely.
Step 5: Clean the Area
Before installing the new clutch, wipe the surrounding area with a cloth. Dust and residue can affect the fit of the replacement part.
If liquid has leaked underneath previously, make sure everything is dry before continuing.
Step 6: Install the New Clutch
Thread the new clutch onto the motor shaft carefully. Tighten it securely, but do not over-tighten. Applying too much pressure may damage the part before it is even used.
Make sure the clutch sits evenly and spins smoothly without wobbling.
Step 7: Test the Blender
Place the blender jar back onto the base and test the appliance using water first. This helps confirm that the blades are spinning correctly without risking damage from thick ingredients.
If everything sounds smooth and the blades rotate properly, the repair is complete.
Common Mistakes to Avoid During Replacement
Although blender clutch replacement is simple, there are still a few mistakes people commonly make during the process.
One mistake is buying the wrong replacement part. Blender clutches are not universal, so always check your blender model carefully before ordering.
Another mistake is over-tightening the new clutch. Many people assume tighter is better, but excessive force can crack plastic components or damage the motor shaft.
Forgetting about reverse threading is another common issue. People often turn the clutch the wrong direction and accidentally make removal more difficult.
Some users also skip cleaning before installation. Dirt and food residue underneath the clutch can affect performance and shorten the lifespan of the new part.
Testing the blender immediately with thick ingredients is also not recommended. Water is safer for the first test because it allows you to confirm everything works correctly without putting pressure on the new clutch.
Why Repairing a Blender Makes Financial Sense
Many people automatically replace kitchen appliances the moment something stops working. In reality, blenders are often among the easiest appliances to repair.
A high-quality blender can be expensive, especially premium models used for smoothies, soups, or protein shakes. Replacing an entire appliance because of one worn-out clutch usually does not make financial sense.
Replacement blender clutches are affordable and widely available online. The repair itself takes very little time and usually requires no professional help.
There is also an environmental benefit to repairing instead of replacing. Small appliance waste continues to grow every year, and many discarded blenders still contain perfectly functional motors and components.
Repairing appliances extends their lifespan and reduces unnecessary waste. For customers who value sustainability and saving money, replacing blender parts is often the smarter long-term choice.
How to Make Your Blender Clutch Last Longer
Once you install a new clutch, a few simple habits can help extend its lifespan significantly.
Avoid overfilling the blender jar, especially with thick mixtures or frozen ingredients. Excessive strain increases wear on the clutch and motor.
Adding enough liquid before blending hard ingredients also reduces stress on the internal components.
Cleaning the blender regularly is important as well. Food buildup around the blade assembly can affect rotation and create additional resistance during blending.
It is also a good idea to avoid running the blender continuously for long periods. Giving the motor short breaks during heavy blending sessions helps reduce heat buildup.
Checking the clutch occasionally for wear can help catch problems early before they become more serious.
With proper care, a replacement blender clutch can last a long time before needing another repair.
Conclusion
Replacing a blender clutch may sound technical at first, but it is actually one of the easiest kitchen appliance repairs you can do at home. In most cases, the process takes less than ten minutes and requires only a few simple tools.
A worn clutch is often the reason a blender stops spinning even when the motor still works. Fortunately, replacing the damaged part is inexpensive and much more practical than buying a completely new appliance.
Learning basic repairs like this can save money, reduce waste, and extend the life of your kitchen equipment. For many blender owners, replacing a small part is all it takes to restore the appliance back to normal performance.
Before throwing away a blender that no longer spins properly, checking the clutch should always be one of the first troubleshooting steps.
FAQs
How do I know if my blender clutch is broken?
Common signs include the motor running without spinning the blades, grinding noises, or visible wear on the clutch itself.
Can I replace a blender clutch myself?
Yes. Most blender clutch replacements are beginner-friendly and require only basic tools.
How long does it take to replace a blender clutch?
For most blender models, the repair takes around 5 to 10 minutes.
Why is my blender motor running but the blades are not spinning?
This usually happens because the clutch is worn out and no longer connects the motor to the blade assembly properly.
Are blender clutches universal?
No. Replacement clutches must match your specific blender model.
Is it cheaper to repair or replace a blender?
In many cases, replacing a clutch or small part is far cheaper than buying a new blender.
What tools do I need to replace a blender clutch?
Most repairs require only pliers, a towel or glove for grip, and the correct replacement part.
Can a damaged clutch harm the motor?
Yes. Continuing to use a slipping clutch can place extra stress on the motor over time.
Additional Maintenance Tips
After replacing the blender clutch, it is worth paying attention to how the appliance performs over the next few weeks. If the blender runs more smoothly and blends ingredients evenly again, that is usually a good sign that the repair was successful. Small improvements in performance are often noticeable immediately after installing a new part.
It is also helpful to keep an extra replacement clutch at home if you use your blender frequently. Since the part is inexpensive and easy to install, having a spare available can save time in the future.
Many people are surprised by how reliable blenders become again after this simple repair. A worn clutch can make the appliance seem completely broken when the actual problem is minor. Taking the time to repair instead of replace can save money and help extend the life of kitchen appliances that still have years of use left in them.